Airmail.Net Email Settings
When you think of configuring your Airmail email account, the next thing to strike in your mind is “Airmail.Net Email Settings”. Without proper email settings, email services cannot be accessed. The Airmail.Net email settings mainly comprise of the IMAP, POP and SMTP server settings. The IMAP and POP server take care of the incoming emails and the SMTP server handles the outgoing emails.
In the article below, we will cover the detailed steps to configure your Airmail account on the different devices and email clients along with the proper email settings. The steps are described in such a manner that you won’t face any difficulty in following and executing them. You won’t need any technical expertise or helping hand.
Let’s proceed with the Airmail IMAP and SMTP server settings:
Airmail.Net Email POP (incoming mail server) Settings
Below mentioned are the Airmail.Net email IMAP settings that you need to apply while configuring your Airmail email account.
| Incoming Server account type | POP |
| Incoming Server user name | Your full Airmail.Net email address. |
| Incoming Server password | Your Airmail.Net email password |
| Incoming Server hostname | pop.airmail.net |
| Incoming Server Port | 110 |
| Incoming Server TLS/SSL required | NO |
| Authentication required | YES (Email account Username and Password) |
After you apply these settings, incoming mail services will be activated for your email account.
Now, to also use the outgoing email services, you must input and apply the below-mentioned settings.
Airmail.Net Email SMTP (outgoing mail server) Settings
| Outgoing Server account type | SMTP |
| Outgoing Server user name | Your full Airmail.Net Email address. |
| Outgoing Server password | Your Airmail.Net email password |
| Outgoing Server hostname | smtp.airmail.net |
| Outgoing Server port | 587 |
| Outgoing Server TLS/SSL required | NO |
| Authentication required | YES (Email account Username and Password) |
The aforementioned settings will enable the outgoing email services for your Airmail.Net email account and now you can start sending emails to your contacts.
Airmail.Net Email Settings For Android Smartphones
The steps to be followed in order to apply the required Airmail.Net email settings for android smartphones are as follows:
Step 1- Firstly, select the “Mail” icon from your app drawer menu.
Step 2- Now input the email address and email password in the field boxes.
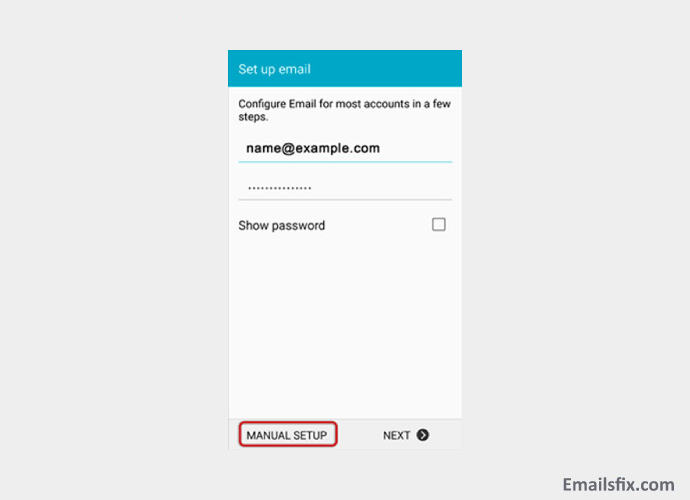
Step 3- Select “POP”.
Step 4- Now if you have chosen to go with the POP server, then input the settings as below and then click on “Next”.
- Input “pop.airmail.net” in the place of the POP server.
- Set the security type as None.
- Set the port to 110 for the POP server.
- Set the Secure port to 993 and security type as SSL/TLS (Accept all certificates).

- Set the Insecure port to 110 and security type as None (Accept all certificates).
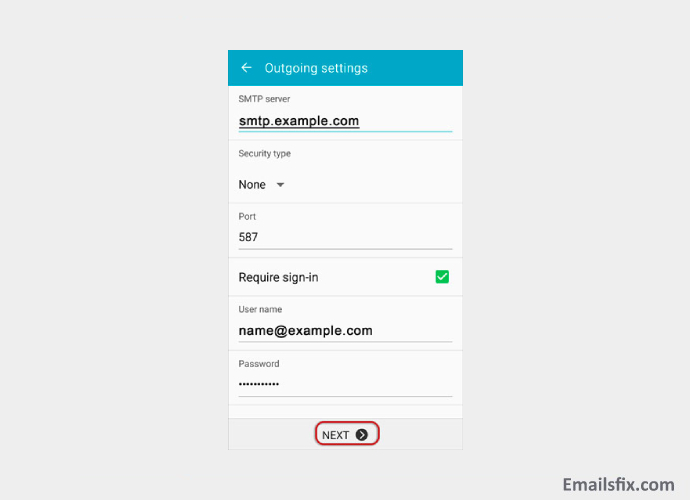
Step 5- Input the below-mentioned settings for the SMTP (outgoing) mail server and then click on “Next”.
- Input “smtp.airmail.net” in the place of the SMTP server.
- Set the security type as None.
- Set the port to 587 for SMTP (outgoing) server. The general SMTP server port settings are as follows:
- Set the (SMTP) outgoing secure port to 465 and security type as SSL/TLS (Accept all certificates).
- Set the (SMTP roaming server) outgoing secure port to 587 and security type as SSL/TLS (Accept all certificates).
- Set the (SMTP) outgoing port to 25 and security type as None (Accept all certificates).
- Set the (SMTP roaming server) outgoing insecure port to 587 and security type as None (Accept all certificates).
- In the end, click on the “Done” button.
Congratulations! Now your Airmail email account has been successfully configured and you are all set to use the Airmail email services on your android device.
Airmail.Net Email Settings for iPhone
The Airmail.Net email settings for the iPhone are described below in a stepwise manner. Follow the steps carefully and get your Airmail email account configured on your iPhone without any hassle.
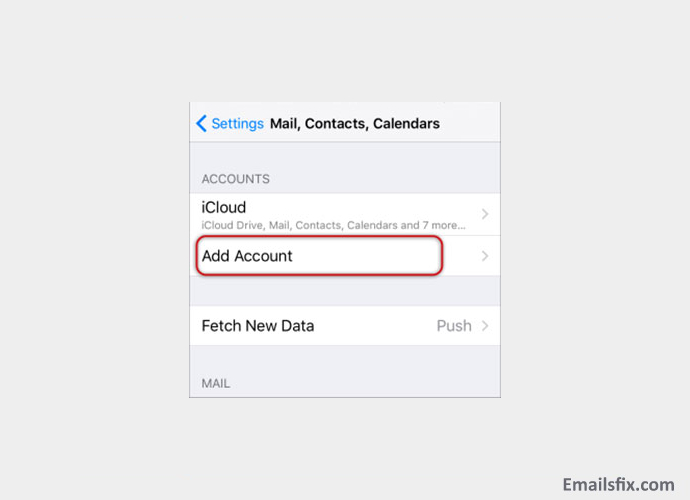
Step 1- Firstly, go to the settings of your iPhone.

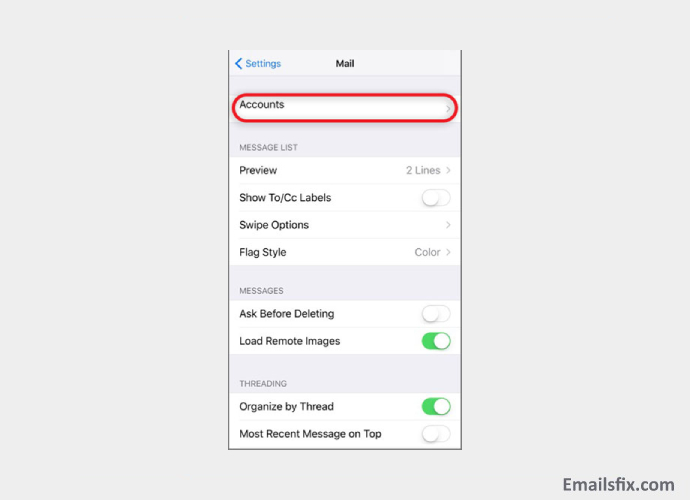
Step 2- Now, select “Mail”.

Step 3- Select “Accounts”.
Step 4- Select the “Add Account” option.
Step 5- From the available menu, select “Other”.

Step 6- Click on the “Add Mail Account” option.

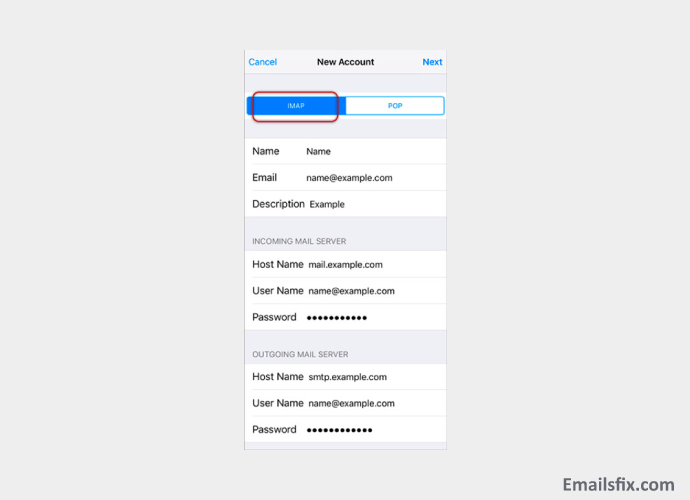
Step 7- Now you need to enter the required details such as your name, email address and password and then make click on the “Next” button.

Step 8- Select “POP”. Enter the required information under the incoming mail server and outgoing mail server as mentioned below and then click on “Next”.
- Input your full email address in the place of Username. The username and password will remain the same for both the incoming and outgoing mail servers.
- Input “pop.airmail.net” in the place of incoming mail server hostname.
- Input “smtp.airmail.net” in the place of outgoing mail server hostname.
Step 9- A prompt message may appear for the incoming and outgoing server verification, you need to click on the “Continue” button for both or click on “Details” and then click on “Trust”.

Step 10- Click on the “Save” button.

Step 11- Select the new account created by you.
Step 12- Select the “SMTP Server”.
Step 13- Make sure that the SMTP settings are as below and then click on “Done”.
- The outgoing mail server hostname must be “smtp.airmail.net”.
- Your full email address must be the username.
- Your email account password must be the password.
- You can set the SSL to On or turn it off and enter the port settings as mentioned below.
| Outgoing secure port | 465 |
| Security Type | SSL/TLS (Accept all certificates) |
| Outgoing secure port (SMTP roaming server) | 587 |
| Security type | SSL/TLS (Accept all certificates) |
| Outgoing port (SMTP) | SSL/TLS (Accept all certificates) |
| Security type | None (Accept all certificates). |
| Insecure port (SMTP roaming server) | 587 |
| Security type | None (Accept all certificates) |
- Select the “Password” option for Authentication.
- Set server port to 587.
Great! The Airmail.Net email settings for the iPhone have been successfully applied, try to send a message to any of your contacts and check for the activation of the services.
Airmail.Net Email Settings for Outlook (Manual setup)
Thinking about the Airmail.Net email settings for Outlook? Then just read below and find the correct Airmail.Net email settings for Outlook. The settings will be more or less similar for all the Outlook versions. So let’s begin.
- Firstly, launch the Outlook program on your system.
- Now, go to the “Tools” option that is located under the top menu section.
- Select “Accounts Settings”.

- Make a click on “New” under the email section.

- Choose the “Microsoft Exchange, IMAP, HTTP or POP3” and then click on “Next”.
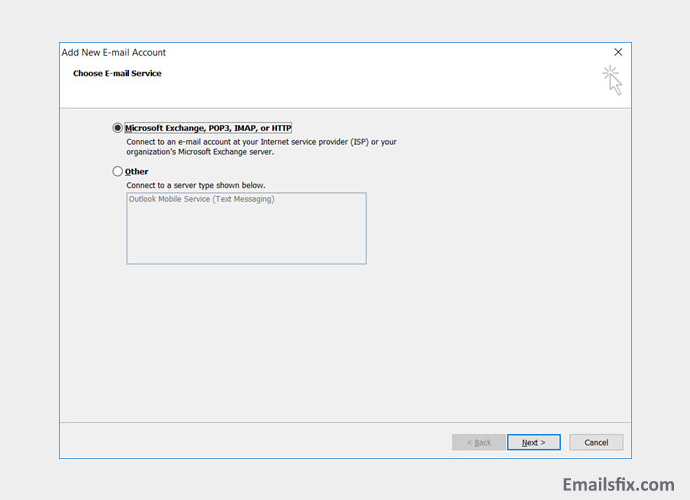
- Make sure to tick the checkbox that says “Manually configure settings or additional server types” and then click on the “Next” button.
- Select the option of “Internet email” and then click “Next”.
- Input all the required details (select IMAP or POP server as per your requirements) in the respective fields and then make a click on “More Settings”.
- Go to the outgoing server tab and make sure that the “My outgoing server (SMTP) requires authentication” checkbox is ticked along with the “Use same settings as my incoming mail server” checkbox.
- Go to the Advanced tab and make sure that the Airmail.Net email settings are as mentioned below according to your choice of IMAP or POP server.
Airmail.Net email POP settings
| Incoming port | 110 |
| Outgoing port | 587 |
| Secure port | 995 |
| Security type | SSL/TLS (Accept all certificates) |
| Insecure port | 110 |
| Security type | None (Accept all certificates) |
| Use the following type of encrypted connection | Set as None |
Airmail.Net email IMAP settings
| Incoming port | 143 |
| Outgoing port | 587 |
| Secure port | 993 |
| Security type | SSL/TLS (Accept all certificates) |
| Insecure port | 143 |
| Security type | None (Accept all certificates) |
| This server requires an encrypted connection (SSL) | Must not be ticked |
| Use the following type of encrypted connection | Must be set as None |
- TIck the “This service requires a secure connection (SSL)” option for both the outgoing as well as incoming emails if you choose to go with the “Secure SSL/TLS Settings”.
Airmail.Net email general SMTP settings
| Outgoing port (SMTP) | 465 |
| Security type | SSL/TLS (Accept all certificates) |
| Outgoing secure port (SMTP roaming server) | 587 |
| Security type | SSL/TLS (Accept all certificates) |
| Outgoing port (SMTP) | 25 |
| Security type | None (Accept all certificates) |
| Outgoing insecure port (SMTP roaming server) | 587 |
| Security type | None (Accept all certificates |
- Make a click on “OK” to save and apply all the settings.
- In the end, make a click on “Next” and then “Finish”.
The aforementioned Airmail.Net email settings will be really helpful for you if you wish to configure your Airmail email account on Outlook.
Airmail.Net Email Settings for Outlook (Automatic setup)
If you wish to use the automatic settings to configure your Airmail email account on Outlook, then the steps will be as follows.
- Firstly, launch the Outlook program on your system.
- Now, make a selection for the tools option from the menu bar and then click on “Accounts settings”.
- Under the Accounts settings page, go to the email tab and then click on “New”.
- Select the “Microsoft Exchange, IMAP, POP3 or HTTP” option and then click on the “Next” button.
- Now you need to input your name, email address and password and then make a click on the “Next” button.
- The Outlook program will configure your account as per the automatic IMAP settings.
- In the end, make a click on “Finish” and then “Close”.
Congratulations! You have followed all the required steps for the automatic set up of your Airmail account.
So, these were the stepwise Airmail.Net email settings for different devices and email clients. Through the aforementioned steps, you will be able to configure your Airmail email account without much time and effort.
Here, you will find everything under a single roof. Have a look at more detailed guides covering the different email settings of different email service providers such as Suddenlink Email Settings, and Earthlink Email Settings. After going through these stepwise guides, you won’t have to struggle anywhere else. You will find complete information with the proper email settings.
Are you still confused or stuck somewhere? No worries, get connected to our trained experts through the live chat support and get the required assistance. Our experts can handle all your email settings related queries, you will surely get the desired output. We are at your service 24*7 as we believe in achieving greater customer satisfaction and trust.